

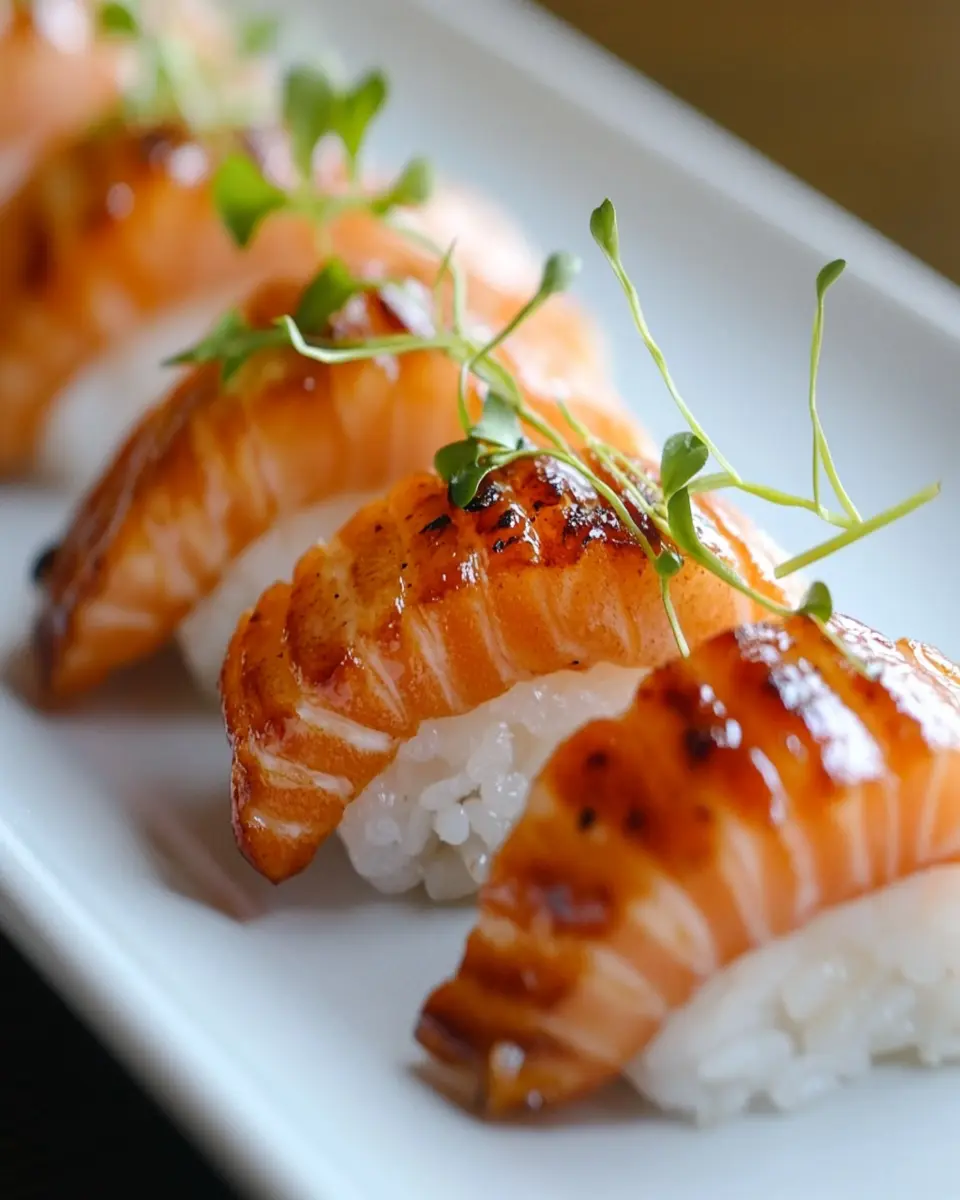
Introduction to Salmon Belly Torched Nigiri-Style
Salmon Belly Torched Nigiri-Style is a delightful culinary creation that harmonizes the rich, buttery flavor of salmon belly with the classic elegance of nigiri. This dish is not only a feast for the eyes but also an indulgence for the palate, showcasing the beauty of Japanese cuisine in a modern twist. By lightly torching the salmon, you enhance its natural flavors, creating a smoky, caramelized exterior that complements the tender sushi rice beneath.
A Culinary Adventure for Home Cooks
If you’re a young professional with a love for homemade food, this recipe is perfect for your busy lifestyle. It’s straightforward yet impressive, allowing you to bring a taste of fine dining into your own kitchen without spending hours preparing it. Imagine serving this exquisite dish to friends at your next gathering; the combination of textures and flavors is sure to impress!
The Perfect Balance of Ingredients
The beauty of Salmon Belly Torched Nigiri-Style lies in its simplicity. Each ingredient plays a crucial role in achieving the perfect balance: the creamy salmon belly melts in your mouth, the sushi rice provides a satisfying chew, and the wasabi adds a kick that elevates the dish. Whether you’re a seasoned sushi maker or trying your hand at it for the first time, this recipe is designed to be approachable and rewarding.
In just a few steps, you can create a dish that not only tastes amazing but also showcases your culinary skills. So gather your ingredients and get ready to embark on a delicious journey with this mouthwatering recipe!
Key Ingredients
Salmon Belly (8 ounces)
Salmon belly is the star of this dish, known for its rich, buttery texture and flavor. This cut of salmon has a higher fat content, making it ideal for achieving that melt-in-your-mouth experience that is essential for nigiri.
Sushi Rice (2 cups)
Sushi rice is short-grain rice that becomes sticky when cooked, allowing it to hold its shape when molded. The texture is crucial for binding the ingredients together while providing a satisfying chew.
Rice Vinegar (1/4 cup)
Rice vinegar adds a mild acidity to the sushi rice, balancing the richness of the salmon. It enhances the overall flavor profile and is essential for achieving that classic sushi taste.
Sugar (1 tablespoon)
Sugar is combined with rice vinegar to create a sweet and tangy seasoning for the rice. This subtle sweetness complements the savory elements of the dish.
Salt (1/2 teaspoon)
Salt enhances the flavors of all the ingredients, bringing out the natural taste of the salmon and the seasoned rice. It’s a key component in achieving a well-rounded dish.
Wasabi (1 teaspoon)
Wasabi adds a spicy kick that elevates the flavor of the salmon belly. Just a small dab on each piece provides a nice contrast to the richness of the fish.
Soy Sauce (1 tablespoon)
Soy sauce is drizzled over the finished nigiri, adding umami and depth to the dish. It’s a classic accompaniment that complements the flavors beautifully.
Scallions (1 tablespoon, chopped)
Chopped scallions offer a fresh, onion-like crunch that adds brightness to each bite. They are the perfect garnish for this elegant dish.
Nori (1 sheet, cut into strips)
Nori is used to wrap the nigiri or serve as a garnish. It adds a layer of flavor and a hint of umami, enhancing the overall experience of eating sushi.

Why You’ll Love This Recipe
When it comes to a delightful blend of flavors and textures, Salmon Belly Torched Nigiri-Style stands out as a must-try. This recipe is perfect for those who appreciate the rich, buttery taste of salmon belly combined with the satisfying chew of sushi rice. It’s an easy yet impressive dish that brings the essence of Japanese cuisine right to your home.
A Quick and Delicious Meal
If you’re a young professional pressed for time, this recipe is ideal for you. With a total time of just 50 minutes, you can prepare a gourmet meal that feels special without spending hours in the kitchen. Plus, the light torching adds a smoky flavor that elevates the dish, making it perfect for entertaining or a cozy night in.
Elevate Your Culinary Skills
Making Salmon Belly Torched Nigiri-Style is not just about tasting amazing food; it’s also about the experience of creating something beautiful. Each step, from shaping the rice to the final torching, is an opportunity to practice your culinary skills. You’ll impress your friends and family while enjoying the delicious results of your hard work.
This recipe is not just food; it’s a way to express creativity and bring joy to your table. Don’t miss out on this delightful culinary adventure!
Variations of Salmon Belly Nigiri
Exploring variations of Salmon Belly Torched Nigiri-Style can elevate your sushi-making experience and cater to different tastes. This dish is incredibly versatile, allowing you to experiment with various toppings and accompaniments while maintaining the delicious essence of the original recipe.
Flavorful Toppings
One way to customize your nigiri is by adding different toppings. Instead of wasabi, try a slice of avocado for creaminess or a sprinkle of sesame seeds for a nutty crunch. You can also experiment with flavored soy sauces, such as citrus-infused or spicy versions, to add an extra layer of flavor.
Alternative Fish Options
While salmon belly is the star here, switching it up with other fish can offer exciting new tastes. Tuna belly, for instance, has a similar richness and can be torched just like salmon for a delightful twist. You could also explore using mackerel or even grilled eel for a completely different flavor profile that still aligns with the essence of sushi.
Seasonal Ingredients
Incorporating seasonal ingredients can enhance the freshness of your nigiri. For spring, consider adding a thin slice of cucumber or a touch of pickled ginger on top. In the fall, a hint of roasted pumpkin puree can add warmth and earthiness, making your Salmon Belly Torched Nigiri truly unique.
These variations not only allow for creativity in the kitchen but also ensure that every serving of Salmon Belly Torched Nigiri-Style feels new and exciting!
Cooking Tips and Notes
Cooking Salmon Belly Torched Nigiri-Style is not only about following a recipe; it’s about enhancing flavors and perfecting techniques to create a dish that shines. Here are some tips to help you achieve the best results.
Choosing the Right Salmon
When selecting salmon belly, freshness is key. Look for vibrant color and a firm texture. High-quality fish will elevate the dish significantly, so don’t hesitate to visit a trusted fishmonger or seafood market. Remember, the better the salmon, the better your nigiri will taste.
Mastering Sushi Rice
The rice is just as important as the salmon. Rinse the sushi rice thoroughly to remove excess starch, ensuring it cooks up sticky but not gummy. Once cooked, mix the rice with the rice vinegar mixture while it’s still warm to help it absorb the flavors. Properly seasoned rice is crucial for balancing the richness of the salmon.
Perfecting the Torch Technique
When using a kitchen torch, practice makes perfect. Hold the torch at a distance and move it slowly over the salmon belly to achieve an even sear without overcooking. The goal is to caramelize the top, enhancing its flavor, while keeping the interior tender and luscious. A light touch can make all the difference.
These tips will help you create a stunning Salmon Belly Torched Nigiri-Style that impresses any guest and delights your taste buds!
Serving Suggestions
Pairing your Salmon Belly Torched Nigiri-Style with the right accompaniments can elevate your dining experience, making it not only delicious but also visually appealing.
Complementary Sides
Serving nigiri with a side of light, refreshing miso soup can enhance the overall experience. The warm broth contrasts nicely with the cool, rich flavors of the salmon. Additionally, a small salad of cucumber and seaweed tossed in a sesame dressing provides a crunchy, flavorful contrast that balances the dish.
Beverage Pairings
For beverages, consider serving your nigiri with a chilled glass of sake or a light, crisp white wine like Sauvignon Blanc. These drinks complement the delicate flavors of the salmon and enhance the dining experience. If you prefer non-alcoholic options, a refreshing green tea is a classic choice that pairs beautifully.
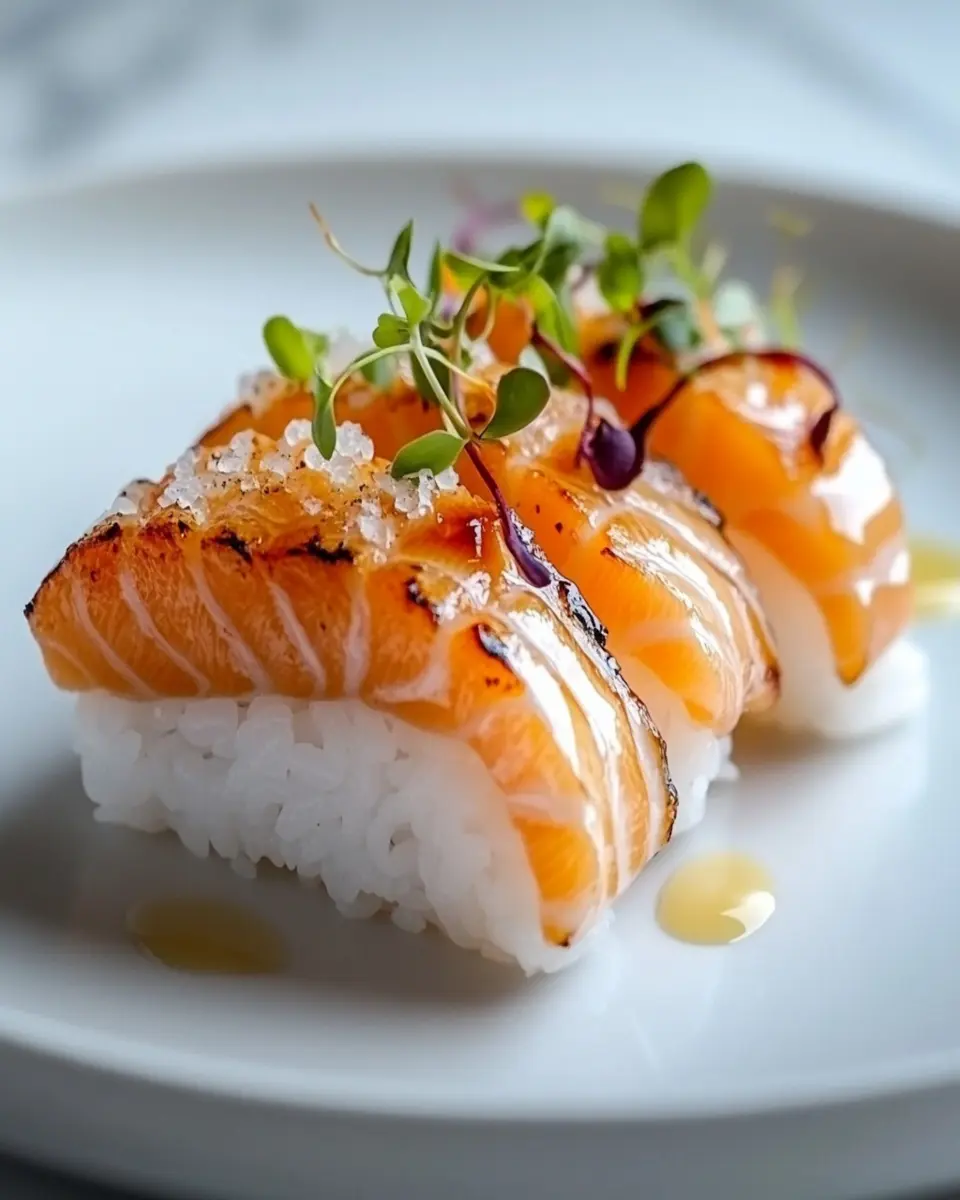
Presentation Tips
For a stunning presentation, arrange your Salmon Belly Torched Nigiri on a clean platter, garnishing with thinly sliced scallions and a drizzle of soy sauce. Add a few strips of nori around the plate for an authentic touch. This not only makes the dish visually appealing but also invites guests to indulge in this exquisite fusion of flavors.
Time Breakdown
Understanding the time it takes to prepare Salmon Belly Torched Nigiri-Style can help you plan your cooking efficiently. Here’s a quick breakdown:
Preparation
30 minutes
Getting your ingredients ready, from rinsing the sushi rice to slicing the salmon, will take about half an hour. This includes cooking the rice according to package instructions, which is crucial for achieving the perfect texture.
Cooking/Baking
20 minutes
The actual cooking time, which involves shaping the rice and lightly torching the salmon, is relatively quick. This step is where you bring everything together, ensuring the salmon is seared just right while keeping the inside tender.
Total
50 minutes
With a total of 50 minutes to prepare this exquisite dish, you can enjoy a gourmet experience without spending all day in the kitchen. This makes it perfect for young professionals and homemade-food lovers looking to impress!
Nutritional Facts
Understanding the nutritional profile of Salmon Belly Torched Nigiri-Style can help you make informed choices while enjoying this delicious dish. Each serving, which consists of two pieces, contains approximately 250 calories, making it a satisfying yet light meal.
The dish is rich in healthy fats, with 15 grams of total fat, primarily coming from the salmon belly, which is known for its omega-3 fatty acids. Additionally, it offers 10 grams of protein, providing a good source of energy and nutrients. The sushi rice contributes 25 grams of carbohydrates, ideal for refueling after a busy day. While the dish is flavorful, it maintains a moderate sodium level of 500 mg, ensuring it’s a delightful indulgence without excessive saltiness.
FAQ based on “People Also Ask” section
What is Salmon Belly Torched Nigiri-Style?
Salmon Belly Torched Nigiri-Style is a delicious fusion of rich salmon belly and traditional sushi rice, lightly seared with a kitchen torch to enhance its flavor. This dish combines the buttery texture of salmon with the satisfying chew of sushi rice, making it a delightful culinary experience.
How do I store leftover Salmon Belly Nigiri?
To store leftover Salmon Belly Torched Nigiri, wrap it tightly in plastic wrap and keep it in the refrigerator. However, it’s best enjoyed fresh, as the texture of the rice can change when stored. If you have leftover salmon, store it separately to maintain its quality.
Can I make this recipe without a kitchen torch?
Yes, if you don’t have a kitchen torch, you can achieve a similar effect by briefly broiling the salmon belly in the oven. Place the salmon on a baking sheet and broil it for a few minutes until it caramelizes, keeping a close eye to prevent overcooking. This will help to mimic the light sear that the torch provides.
Conclusion
In conclusion, Salmon Belly Torched Nigiri-Style is a delightful dish that brings together the rich flavors of salmon belly and the satisfying texture of sushi rice. This recipe is not only simple to make but also perfect for impressing friends and family. With just a few key ingredients and techniques, you can create a gourmet experience right in your kitchen. Whether you’re a seasoned cook or trying your hand at sushi for the first time, this dish offers an enjoyable culinary adventure. Don’t hesitate to cook, save, or share this recipe with fellow food lovers, and let the deliciousness of this torched nigiri inspire your next meal!
Print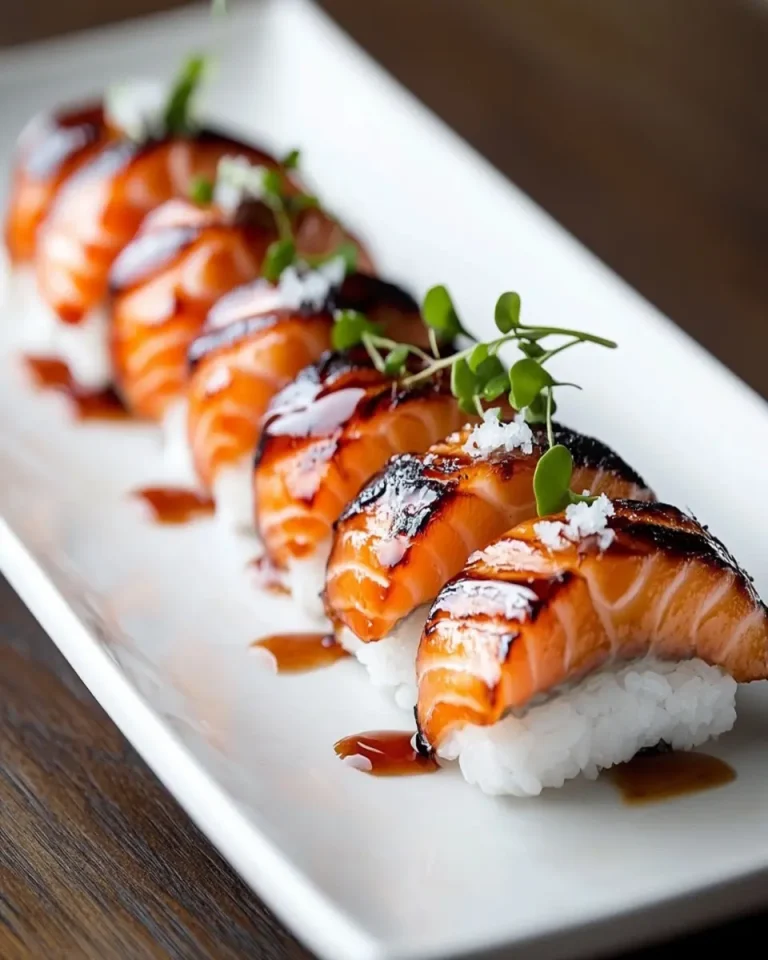
Salmon Belly Torched Nigiri-Style
A delicious fusion of salmon belly and nigiri, lightly torched for an exquisite flavor.
- Total Time: 50 minutes
- Yield: 4 servings 1x
Ingredients
- 8 ounces salmon belly
- 2 cups sushi rice
- 1/4 cup rice vinegar
- 1 tablespoon sugar
- 1/2 teaspoon salt
- 1 teaspoon wasabi
- 1 tablespoon soy sauce
- 1 tablespoon scallions, chopped
- 1 sheet nori, cut into strips
Instructions
- Rinse the sushi rice under cold water until the water runs clear. Cook according to package instructions.
- In a small bowl, mix the rice vinegar, sugar, and salt until dissolved. Stir into the cooked rice.
- Shape the sushi rice into small, oval molds.
- Slice the salmon belly into thin pieces.
- Top each rice mold with a slice of salmon belly and a small dab of wasabi.
- Using a kitchen torch, lightly sear the top of the salmon belly until it begins to caramelize.
- Drizzle with soy sauce and garnish with scallions and nori.
Notes
- For the best flavor, use fresh, high-quality salmon belly.
- You can adjust the amount of wasabi to your taste.
- Make sure to torch the salmon just enough to enhance the flavor without overcooking.
- Prep Time: 30 minutes
- Cook Time: 20 minutes
- Category: Sushi
- Method: Torching
- Cuisine: Japanese
- Diet: Pescatarian
Nutrition
- Serving Size: 2 pieces
- Calories: 250
- Sugar: 1g
- Sodium: 500mg
- Fat: 15g
- Saturated Fat: 3g
- Unsaturated Fat: 10g
- Trans Fat: 0g
- Carbohydrates: 25g
- Fiber: 0g
- Protein: 10g
- Cholesterol: 40mg