
Introduction to Honeycomb Crunch Cheesecake Bites
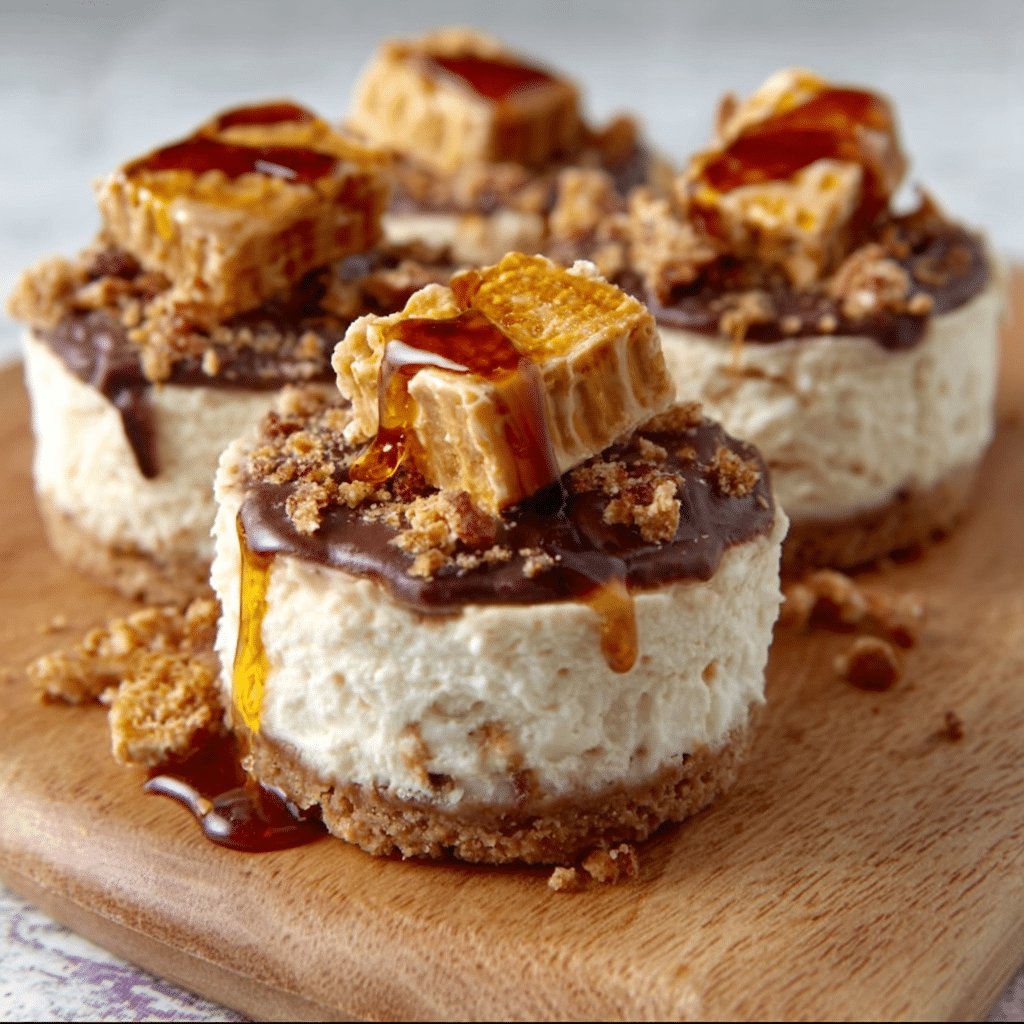
Hey there, fellow food lovers! If you’re anything like me, you know that life can get pretty hectic, especially when juggling family, work, and everything in between. That’s why I’m excited to share my delightful Honeycomb Crunch Cheesecake Bites with you! These little gems are not only a quick solution for a busy day, but they also pack a punch of flavor that will impress your loved ones. Imagine creamy cheesecake with a delightful crunch, all in a bite-sized treat. Perfect for gatherings or just a sweet pick-me-up after a long day!
Why You’ll Love This Honeycomb Crunch Cheesecake Bites
Let me tell you, these Honeycomb Crunch Cheesecake Bites are a game-changer! They’re incredibly easy to whip up, taking just 20 minutes of your time, plus a little chill time. The taste? Oh, it’s a heavenly blend of creamy and crunchy that will have your taste buds dancing! Whether you’re hosting a gathering or just treating yourself, these bites are sure to bring smiles all around. Trust me, you’ll want to make them again and again!
Ingredients for Honeycomb Crunch Cheesecake Bites
Before we dive into the deliciousness of these Honeycomb Crunch Cheesecake Bites, let’s gather our ingredients! Each one plays a vital role in creating that perfect balance of creamy and crunchy. Here’s what you’ll need:
- Crushed digestive biscuits: These provide a buttery, crumbly base that holds everything together. You can also use graham crackers if you prefer a different flavor.
- Melted unsalted butter: This helps bind the biscuit crumbs and adds richness. Unsalted is best, so you can control the saltiness of your dessert.
- Softened cream cheese: The star of the show! It gives that creamy texture we all love in cheesecake. Make sure it’s at room temperature for easy mixing.
- Confectioners’ sugar: This sweetens the cream cheese without adding graininess. It dissolves beautifully, making your cheesecake smooth and luscious.
- Pure vanilla extract: A splash of this adds depth and warmth to the flavor. Always opt for pure over imitation for the best taste.
- Chilled heavy cream: Whipping this up creates a light and airy texture in your cheesecake. It’s what makes each bite feel like a cloud of deliciousness!
- Crushed honeycomb candy: This is where the magic happens! It adds a delightful crunch and a hint of sweetness. If you can’t find honeycomb, crushed caramel or toffee can be a fun substitute.
- Sea salt: Just a pinch enhances all the flavors and balances the sweetness. It’s amazing how a little salt can elevate a dessert!
For exact measurements, check the bottom of the article where you can find everything listed for easy printing. Now that we have our ingredients ready, let’s get to the fun part—making these scrumptious bites!
How to Make Honeycomb Crunch Cheesecake Bites
Now that we have our ingredients ready, let’s dive into the fun part—making these delightful Honeycomb Crunch Cheesecake Bites! Follow these simple steps, and you’ll have a delicious dessert that’s sure to impress.
Step 1: Prepare the Biscuit Base
First things first, let’s get that biscuit base ready! In a mixing bowl, combine your crushed digestive biscuits with the melted unsalted butter. Use a fork or your hands to mix them together until it resembles wet sand. It should hold together when you squeeze it. Once mixed, press this mixture firmly into the bottom of a 9-inch square baking pan. Make sure it’s even and compact; this will be the sturdy foundation for your cheesecake bites!
Step 2: Chill the Base
Now, it’s time to chill! Pop the pan into the refrigerator for about 15 minutes. This step is crucial because it helps the biscuit base firm up, making it easier to slice later. Trust me, you don’t want a crumbly mess when you’re ready to serve these tasty bites!
Step 3: Whip the Cream Cheese
While the base is chilling, let’s whip up that creamy filling! In a separate bowl, take your softened cream cheese and beat it with an electric mixer until it’s light and fluffy. This should take about 2-3 minutes. You want it to be smooth and creamy, with no lumps. It’s like giving your cheesecake a little spa treatment!
Step 4: Add Sugar and Vanilla
Next, gradually add in the confectioners’ sugar and pure vanilla extract. Mix on low speed until everything is well blended. This is where the magic happens! The sugar sweetens the cream cheese, while the vanilla adds a lovely depth of flavor. Just be careful not to overmix; we want to keep that fluffy texture!
Step 5: Whip the Heavy Cream
Now, let’s make that heavy cream light and airy! In another bowl, whip the chilled heavy cream until stiff peaks form. This means when you lift the beaters, the cream should hold its shape and not droop. It’s like creating little clouds of deliciousness that will make your cheesecake bites extra special!
Step 6: Combine Mixtures
Time to bring it all together! Gently fold the whipped cream into the cream cheese mixture. Use a spatula and be careful not to deflate the whipped cream. You want to keep that airy texture! Fold until just combined, and you’ll see the mixture turn into a beautiful, creamy filling.
Step 7: Add Honeycomb and Salt
Now for the fun part—adding the crushed honeycomb and a pinch of sea salt! Gently fold these into the mixture, ensuring they’re evenly distributed. The honeycomb adds that delightful crunch, while the salt enhances all the flavors. It’s like a little sprinkle of magic!
Step 8: Pour and Chill
Pour the creamy filling over your chilled biscuit crust. Use a spatula to smooth the top, making it look all pretty. Cover the pan with plastic wrap and pop it back into the refrigerator. Let it chill for at least 4 hours, or until it’s completely set. Patience is key here, but I promise it’ll be worth the wait!
Step 9: Serve
Finally, the moment we’ve all been waiting for! Once set, take the cheesecake out of the fridge and slice it into small squares. For an extra touch, sprinkle some additional crushed honeycomb on top before serving. These Honeycomb Crunch Cheesecake Bites are now ready to be devoured! Enjoy every creamy, crunchy bite!
Tips for Success
- Make sure your cream cheese is at room temperature for easy mixing.
- Don’t skip the chilling time; it’s essential for the perfect texture.
- Use a spatula to fold gently; this keeps the whipped cream light and airy.
- For a fun twist, try adding a splash of lemon juice for a zesty flavor.
- Store leftovers in an airtight container in the fridge for up to 3 days.
Equipment Needed
- Mixing bowls: A set of various sizes is handy; you can use any large bowl you have.
- Electric mixer: A hand mixer works great, but a stand mixer is even better if you have one.
- 9-inch square baking pan: If you don’t have one, a round pan will do just fine!
- Spatula: A rubber spatula is perfect for folding and smoothing.
- Measuring cups and spoons: Essential for accuracy; you can also use a kitchen scale if you prefer.
Variations
- Chocolate Drizzle: For a decadent twist, melt some chocolate and drizzle it over the top before serving. It adds a rich flavor that pairs beautifully with the cheesecake!
- Fruit Topping: Top your bites with fresh berries or a fruit compote for a burst of freshness. Strawberries, raspberries, or blueberries work wonderfully!
- Nutty Crunch: Add chopped nuts like almonds or pecans to the honeycomb mixture for an extra layer of crunch and flavor.
- Gluten-Free Option: Substitute the digestive biscuits with gluten-free cookies or almond flour for a gluten-free version that everyone can enjoy!
- Vegan Adaptation: Use vegan cream cheese and coconut cream in place of heavy cream for a plant-based version that’s just as delicious!
Serving Suggestions
- Pair with Coffee: These Honeycomb Crunch Cheesecake Bites are delightful with a cup of freshly brewed coffee or tea. The flavors complement each other beautifully!
- Fresh Fruit: Serve alongside a bowl of mixed berries for a refreshing contrast to the creamy cheesecake.
- Elegant Presentation: Arrange the bites on a decorative platter and garnish with mint leaves for a pop of color.
FAQs about Honeycomb Crunch Cheesecake Bites
Got questions about these delightful Honeycomb Crunch Cheesecake Bites? You’re not alone! Here are some common queries I’ve come across, along with my answers to help you out:
1. Can I make Honeycomb Crunch Cheesecake Bites ahead of time?
Absolutely! In fact, these bites taste even better after chilling overnight. Just prepare them as directed, cover them well, and store them in the fridge. They’ll be ready to impress your guests the next day!
2. What can I use instead of honeycomb candy?
If honeycomb isn’t available, don’t fret! You can substitute it with crushed caramel or toffee for a similar crunchy texture. Even crushed pretzels can add a fun twist if you’re feeling adventurous!
3. How should I store leftovers?
Store any leftover Honeycomb Crunch Cheesecake Bites in an airtight container in the refrigerator. They’ll stay fresh for up to three days, but I doubt they’ll last that long—they’re just too delicious!
4. Can I freeze these cheesecake bites?
Yes, you can freeze them! Just make sure to wrap them tightly in plastic wrap and then place them in a freezer-safe container. They can be frozen for up to a month. When you’re ready to enjoy, let them thaw in the fridge overnight.
5. Are these bites suitable for special diets?
Great question! You can easily adapt these Honeycomb Crunch Cheesecake Bites for various dietary needs. For a gluten-free version, use gluten-free cookies for the base. If you’re looking for a vegan option, swap in vegan cream cheese and coconut cream. Everyone can enjoy these treats!
Final Thoughts
Making these Honeycomb Crunch Cheesecake Bites is more than just whipping up a dessert; it’s about creating sweet moments with family and friends. The joy of seeing their faces light up with each creamy, crunchy bite is priceless. Plus, the ease of preparation means you can spend less time in the kitchen and more time enjoying life’s little pleasures. Whether it’s a cozy family gathering or a simple treat for yourself, these bites are sure to bring smiles all around. So, roll up your sleeves and dive into this delightful recipe—you won’t regret it!
PrintHoneycomb Crunch Cheesecake Bites will Delight Your Tastebuds
Delightful Honeycomb Crunch Cheesecake Bites that are perfect for any occasion.
- Total Time: 4 hours 20 minutes
- Yield: 12 servings 1x
Ingredients
- 1 cup crushed digestive biscuits
- 4 tablespoons melted unsalted butter
- 1 cup softened cream cheese
- 1/2 cup confectioners’ sugar
- 1 teaspoon pure vanilla extract
- 1 cup chilled heavy cream
- 1/2 cup crushed honeycomb candy (plus extra for garnish)
- 1/4 teaspoon sea salt
Instructions
- Mix the crushed digestive biscuits with the melted butter in a bowl until it resembles wet sand.
- Press the mixture into the base of a 9-inch square baking pan to create a solid layer.
- Refrigerate the pan for about 15 minutes to firm up.
- In a separate bowl, whip the softened cream cheese until light and fluffy using an electric mixer.
- Gradually add in the confectioners’ sugar and vanilla extract, mixing until well blended.
- In another bowl, whip the chilled heavy cream until stiff peaks form.
- Gently fold the whipped cream into the cream cheese mixture until fully combined.
- Incorporate the crushed honeycomb and sea salt, ensuring even distribution.
- Pour the cheesecake filling over the chilled biscuit crust and smooth the top with a spatula.
- Cover and chill in the refrigerator for a minimum of 4 hours, or until set completely.
- Slice into small squares and sprinkle additional crushed honeycomb on top before serving.
Notes
- For a fun variation, drizzle melted chocolate over the squares before serving.
- Consider swapping out the honeycomb for crushed caramel or toffee for a unique twist.
- Prep Time: 20 minutes
- Cook Time: 0 minutes
- Category: Dessert
- Method: No-Bake
- Cuisine: American
- Diet: Vegetarian
Nutrition
- Serving Size: 1 square
- Calories: 220
- Sugar: 10g
- Sodium: 150mg
- Fat: 15g
- Saturated Fat: 9g
- Unsaturated Fat: 6g
- Trans Fat: 0g
- Carbohydrates: 18g
- Fiber: 1g
- Protein: 3g
- Cholesterol: 50mg